
U1001S Smart Air Purifier
SMART AIR PURIFIER USER MANUAL
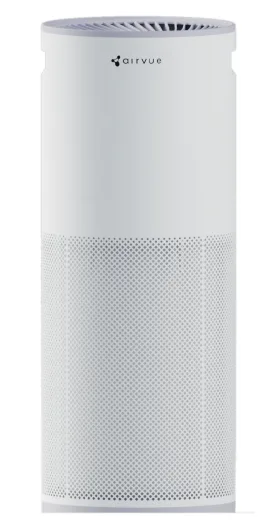
U1001S
Smart Air Purifier
- •Read instructions carefully for safe installation and operation of the air purifier.
- •Remove the filter packaging bag completely before first use. Running the machine with packaging fitted will damage it.
- •Use only genuine Nippo Airvue filters. WARRANTY VOID IF NON-GENUINE FILTER IS USED.
Product support & warranty registration:
Scan for setup help, filter replacement, warranty registration and service requests, or visit www.nippoairvue.com/support
Dear Customer,
Congratulations on your choice of choosing a quality air purifier from NIPPO. Please read the instructions thoroughly before using this product.
Safety Precautions:
- Do not attempt to refit or repair this unit yourself. Servicing must be carried out only by Nippo Airvue Customer Care or an authorised service engineer.
- Do not operate the unit with wet hands, and do not pull on the cord to unplug it — doing so may cause electric shock. If the power cord is damaged, replace it only with a genuine part from Nippo Customer Care.
- Check that your mains supply matches the voltage marked on the product before connecting it. Make sure the socket makes firm contact — a loose socket can cause the plug to overheat.
- Always switch off and unplug the unit before cleaning, maintenance, or moving it. Never move the unit by pulling or tugging the power cord.
- Do not insert fingers or foreign objects into the air inlet or outlet, and do not pour liquids or throw powders into the air outlet. Doing so may cause unexpected damage.
- Never use the unit in a place where flammable or explosive gas is present, and keep open flames (candles, incense, cigarettes) and flammable sprays away from it. Protect the unit from direct sunlight.
- Do not use the unit in a moist environment such as a bathroom, to avoid possible electric shock. Do not wipe the unit with benzine, thinner, or alcohol.
- This unit contains an enclosed UV-C source. Never operate with covers open or attempt to view the UV-C LED directly.
- Do not burn a used filter or put it to any other use. Combustion of the filter may cause irreversible damage or endanger life.
- Children aged 8 years and above, and persons with reduced capabilities, may use this appliance only with supervision or instruction on safe use. Children shall not play with the appliance, or clean and maintain it without supervision.
- When using with gas-fuelled appliances, ventilate sufficiently to avoid carbon monoxide poisoning. This product cannot eliminate carbon monoxide.
Important Notes:
- Remove the filter packaging bag completely before first use. Running the unit with the packaging fitted will damage the motor and void the warranty.
- Make sure the outlet grille and the lower cap are correctly installed before powering the unit on.
- Do not leave the unit in an unstable place. If the unit is knocked over the anti-tipping switch stops the motor, but a fall may still damage the unit.
- Do not use the unit in places heavy with oil particles, such as a kitchen. This unit is not designed for use as an air pump or as ventilation equipment.
- Do not place any object on top of the unit, and do not block the air inlet or outlet.
- Do not place the unit directly beneath an air conditioner — condensate dripping into the unit will damage it.
- This product is designed for indoor use only. Always check the “Troubleshooting” section of this manual before calling for service.
Before Use:
Unpack your air purifier carefully and verify all parts are present in the package before starting.
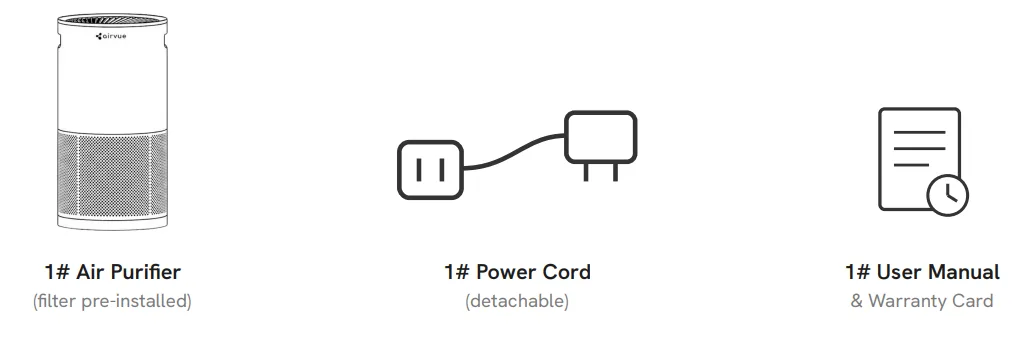
Product Overview:
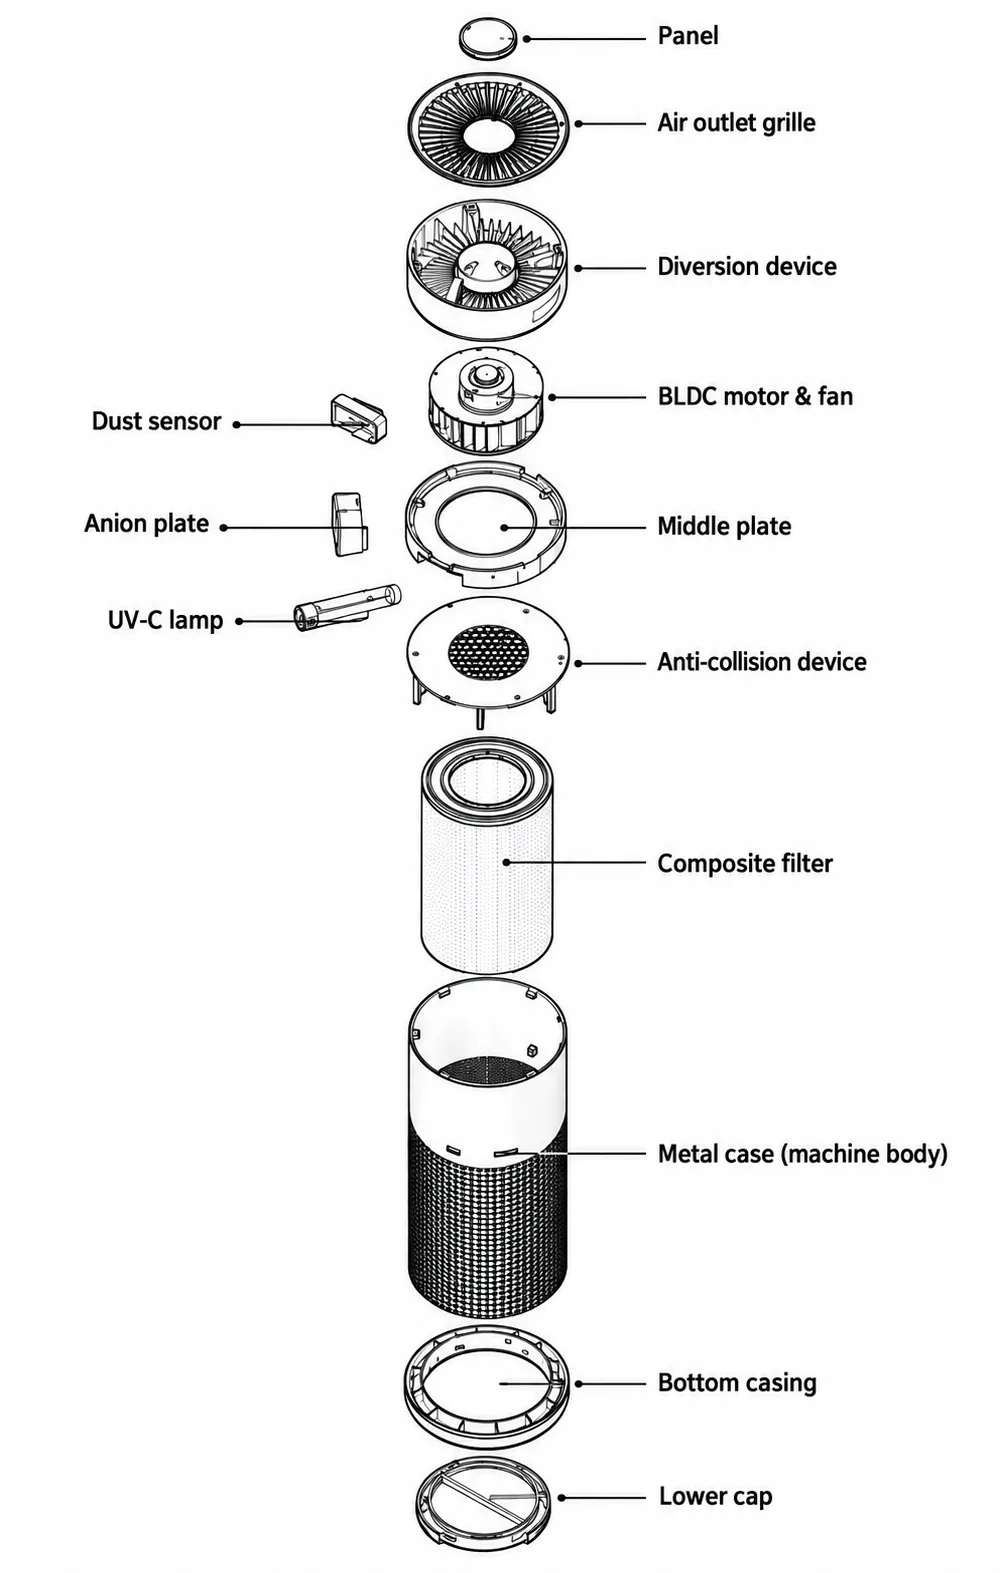
The U1001S in exploded view. The composite filter is reached through the lower cap at the base of the unit; the air outlet grille and the display sit on top.
Preparation Before First Use:
- Open the carton, remove the foam, lift the unit out and stand it on the floor.
- Turn the unit over and unscrew the lower cap in the direction indicated to open it.
- Remove the filter and take it out of its packaging bag completely.
- Place the filter back into the unit and lock the lower cap.
- Stand the unit upright, then take the power cord out of the carton and connect it to the power inlet on the body of the unit.
Positioning the Unit:
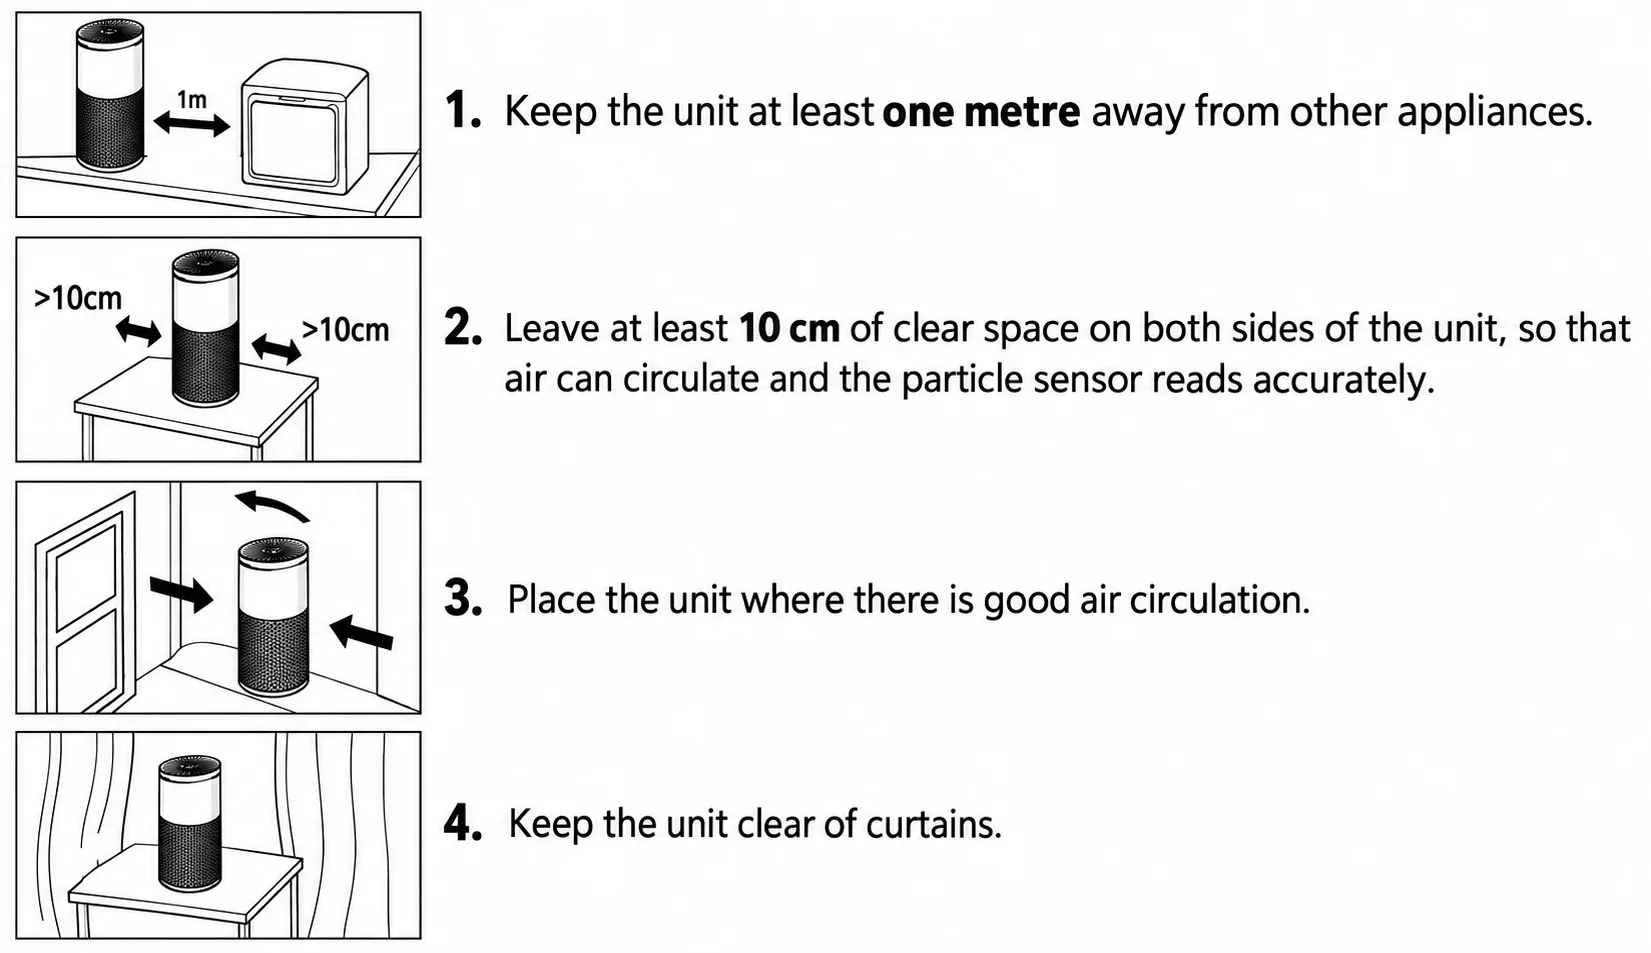
Stand the unit upright on a firm, flat, horizontal surface. Keep it out of direct sunlight and away from heat sources and damp locations, and do not place it directly beneath an air conditioner. For a better purifying effect, keep doors and windows closed when using the unit.
Getting Started:
- Connect the power cord to the inlet on the body of the unit — beside the particle sensor window — and plug the other end into a 220 V~, 50 Hz socket.
- Touch the Power button to begin purifying. The display lights up and shows the current operating mode. The ceramic ioniser starts automatically with the unit.
- The sensor takes a short while to settle after switch-on; the light ring around the display then shows the colour for the current PM2.5 level.
- Touch the Mode button to change the airflow setting, and the Timer button to set a switch-off time.
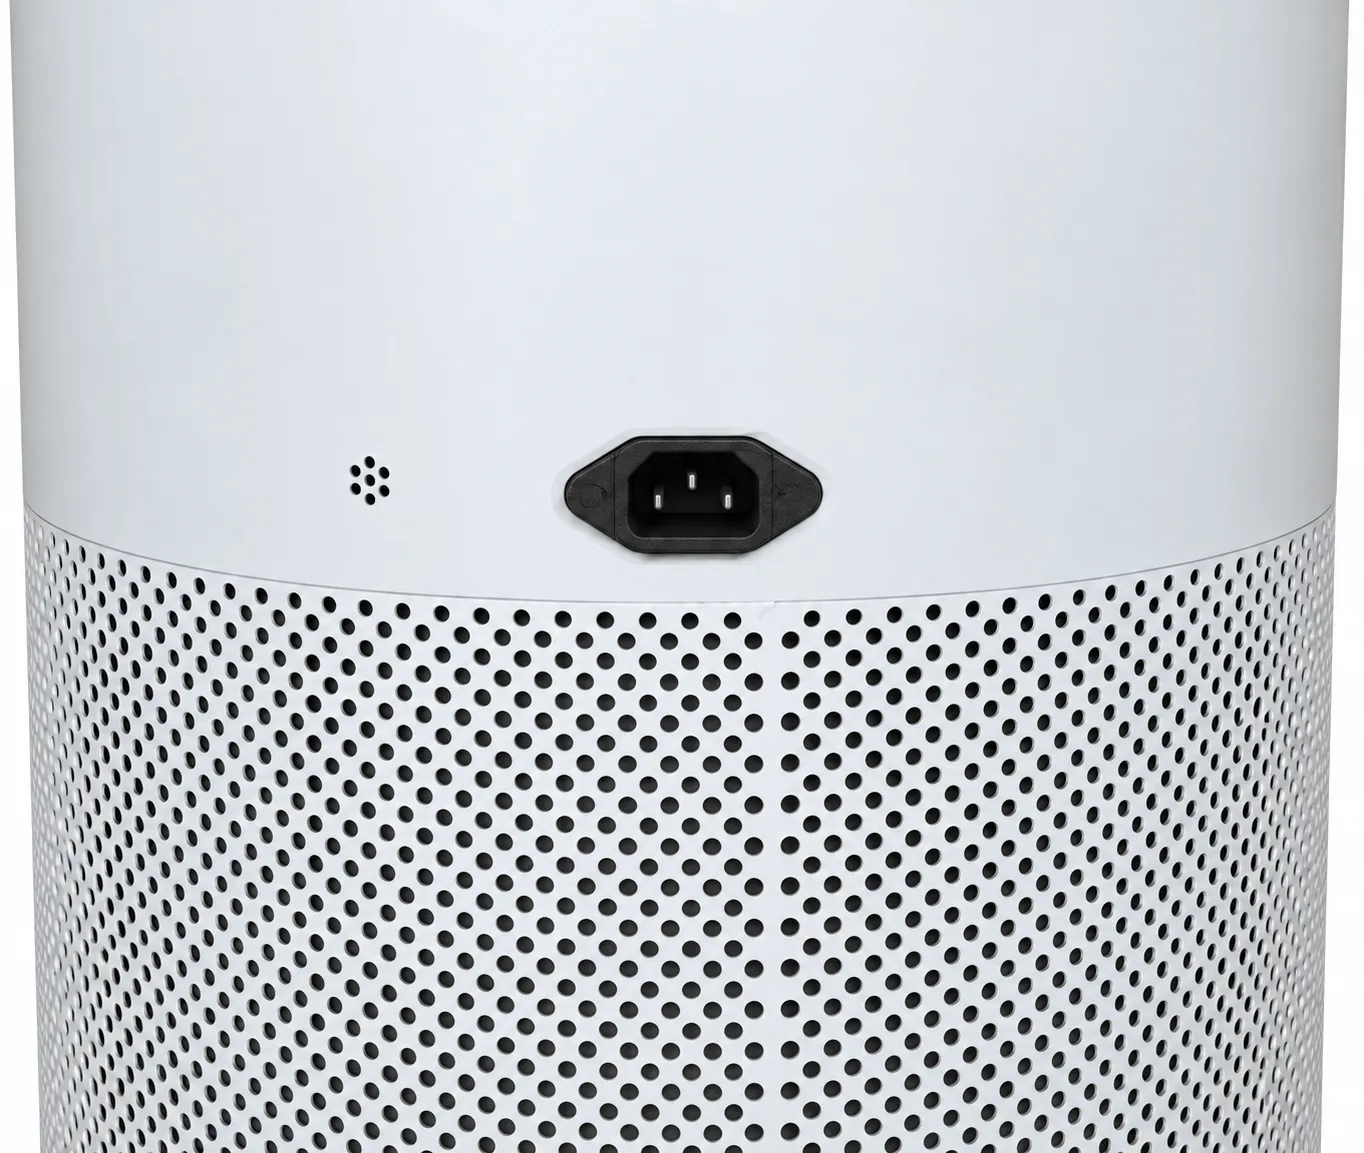
The power inlet on the body of the unit, with the particle sensor window beside it.
Display and Controls:
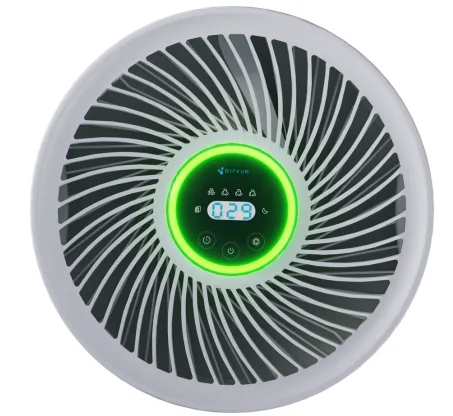
The display sits at the centre of the outlet grille, with the three touch controls on the front rim. The ring around the display changes colour with air quality.
- •Top row — airflow indicators: Speed 1 / 2 / 3 and Auto, with the sleep indicator to the right.
- •Left of centre — filter replacement indicator.
- •Centre — PM2.5 display, showing the measured value.
- •Front rim, left to right — Timer button · Power button · Mode / wind speed button.
Control Functions:
Display Icons:
Operating the Air Purifier:
- Set the unit to Auto mode for everyday use — it adjusts the fan speed automatically according to the PM2.5 concentration detected by the built-in sensor.
- Use Sleep mode during sleep hours — the unit runs at its quietest setting (≤ 32 dB) and the display goes dark.
- Use Mid or High to purify quickly when air quality is poor, while cooking, or while cleaning the room.
- Use the timer to switch the unit off automatically after 1 to 9 hours.
Product Function:
- Five working modes — automatic, sleep, low-grade, mid-grade and high-grade.
- Timing function — 1h to 9h, in one-hour steps.
- Filter change reminder function.
- In automatic mode the air volume is adjusted automatically according to the air quality.
- Anti-tipping function — the unit stops running automatically if it falls to the ground.
Air Quality Indicator and Notifications:
| Indication | Status | Description |
|---|---|---|
| Green light ring | Good air quality (PM2.5 0 – 50 μg/m³) | Air quality causes no harm to people. In Auto mode the unit settles to its quietest speed. |
| Yellow light ring | Moderately polluted (51 – 150 μg/m³) | Children, older people and people with respiratory conditions may be affected. In Auto mode the unit runs at medium airflow. |
| Red light ring | Heavily polluted (above 150 μg/m³) | People should stay inside. In Auto mode the unit runs at high airflow until the air improves. |
| Filter icon lit | Filter life expired (4,320 running hours) | Replace the filter and reset the filter life counter. |
| Wi-Fi icon flashing | Ready to pair | Add the device in the Nippo Airvue app. |
| Wi-Fi icon steady | Connected | The unit is connected to your home network. |
Filter Replacement:
The composite filter is a consumable. The unit counts its running hours and triggers the filter replacement alarm after 4,320 running hours of operation — typically six to twelve months, depending on the operating environment. When the alarm is triggered, the filter icon on the display lights to indicate that the filter must be replaced. Use only genuine Nippo Airvue filters.
- Power off the unit and unplug the power cord.
- Lay the unit on its side or turn it over, and unscrew the lower cap in the direction indicated to open it.
- Remove the old filter — wearing gloves is recommended — and pack it properly for disposal.
- Unpack the new genuine Airvue filter, removing the packing material completely, and place it into the unit. Check the front and the back of the filter so that it is not fitted the wrong way round.
- Refit and lock the lower cap, stand the unit upright on a flat surface, and reconnect the power.
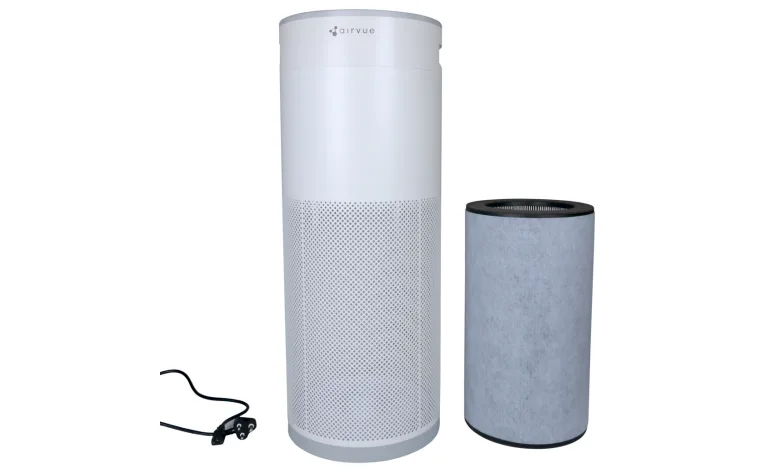
The composite filter is reached through the lower cap at the base of the unit.
Resetting the Filter Timer:
- Touch and hold the Timer and Mode buttons together for about 3 seconds. The buzzer sounds once and the filter life counter resets to zero.
- If the filter icon stays lit after a new filter has been fitted, the counter has not been reset — repeat the step above.
Filter Notes:
- •Remove dust from the filter's outer surface about once every two weeks. The filter cannot be rinsed, washed, or reused, and must not be cleaned with a vacuum cleaner.
- •Do not refit a used filter the wrong way round — dust collected on the filter would be blown back into the room.
- •Always unplug the unit before removing or installing the filter.
Wi-Fi Pairing and App Control:
Download the Nippo Airvue app from the App Store or Google Play and register with your phone number or email. Scan a code below to go straight to the listing.
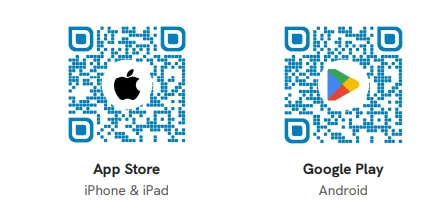
Adding the device
- Have the name and password of your 2.4 GHz Wi-Fi network ready. The purifier joins 2.4 GHz networks only; your phone itself may be on either 2.4 GHz or 5 GHz.
- With the unit powered on, touch and hold the Mode button for about 3 seconds. The buzzer sounds once, the Wi-Fi settings are reset, and the unit enters pairing mode with the Wi-Fi indicator flashing.
- Turn on Bluetooth on your phone, open the Nippo Airvue app, and tap “+” on the home screen to add a device. The app finds the purifier automatically while it is in pairing mode.
- Select the purifier when it appears, enter the name and password of your 2.4 GHz network, and confirm.
- When the app confirms the device has been added, pairing is complete — the Wi-Fi indicator stays steadily lit and the unit is listed in the app.
In the app
On/off, fan speed, working mode, timer, filter life and real-time air quality. Once paired you can control the unit from anywhere, provided both your phone and the purifier have a network connection.
Keep the phone close to the unit while pairing, and keep both the unit and the phone as close to your router as possible. If the purifier does not appear in the app, hold the Mode button for 3 seconds again to return it to pairing mode.
Maintenance:
Cleaning:
- Power off the unit and unplug the power cord.
- Take out the filter and remove the dust from its outer surface.
- Clean the air inlet and outlet, and wipe the body with a soft cotton cloth lightly moistened with a neutral detergent. Take care that water does not drip into the unit through the air outlet.
- Once the unit is completely dry, refit the filter and resume use.
Storage:
- Power off the unit, unplug it, and bundle the power cable.
- Take out the filter, remove dust from its outer surface, and clean the air inlet and outlet.
- Once dry, cover the air outlet and store the unit upright in a well-ventilated place away from direct sunlight. If left unused for a long period, power the unit on for a few minutes from time to time.
TROUBLESHOOTING:
| Problem | Cause | Solution |
|---|---|---|
| Unit not starting | Power cord not connected properly; socket switched off or tripped; lower cap or outlet grille not installed | Check the cord at both ends and the socket. Confirm the lower cap and outlet grille are correctly fitted. |
| Air volume becomes smaller | Filter packaging not removed; filter clogged or at end of life; air inlet or outlet blocked | Remove the filter packaging. Replace the filter if it needs replacing. Clear any obstruction and clean dust from the air inlet. |
| Significant noise | Foreign object inside the unit; filter not seated correctly; unit on an uneven surface | Remove any foreign object and re-seat the filter. Stand the unit level on a firm floor, or select a lower airflow setting. |
| Unusual smell | A slight plastic smell is normal in the first few uses; a dirty filter also causes odour | Clean or replace the filter. If a burning smell is present, unplug the unit immediately and contact Nippo Airvue Service. |
| Unit stops on its own | The timer has finished; the unit has been knocked over and the anti-tipping switch has cut the motor | Stand the unit upright and touch Power to restart. Check whether a timer was set. |
| Filter icon stays lit after a new filter | Filter life counter not reset | Hold Timer + Mode for 3 seconds to reset the counter. |
| Air quality colour not updating | Sensor is settling; dust build-up on the sensor | Allow a short while after switch-on. Keep the sensor window free of dust. |
| Wi-Fi not connecting | Bluetooth not switched on; purifier being joined to a 5 GHz network; Wi-Fi signal too weak; unit not in pairing mode | Turn on Bluetooth and enter a 2.4 GHz network for the purifier. Keep the unit and the phone as close to the router as possible, and hold Mode for 3 seconds to re-enter pairing mode. |
Specifications:
| Model | Nippo Airvue U1001S |
| Coverage Area | 65 – 100 m² (700 – 1,076 sq ft) |
| Working Modes | Auto · Low (Speed 1) · Mid (Speed 2) · High (Speed 3) · Sleep |
| Filtration | 4-stage composite system — pre-filter, True HEPA, activated carbon, nano-organic coating, with UV-C chamber and ceramic negative ioniser |
| Sterilisation | UV-C LED · Ceramic Negative Ion Generator — up to 20,000,000 ions/cm³ |
| Sensors | PM2.5 laser particle sensor |
| Motor | High-efficiency BLDC |
| Noise Level | ≤ 68 dB (Sleep ≤ 32 dB) |
| Timer | 1 – 9 hours, in one-hour steps |
| Filter Life | Replacement alarm at 4,320 running hours — typically 6–12 months, depending on the operating environment |
| Safety | Anti-tipping cut-off · filter replacement reminder |
| Rated Power | 90 W |
| Power Supply | AC 220 V~, 50 Hz (detachable power cord) |
| Connectivity | Wi-Fi 2.4 GHz · Nippo Airvue App (iOS & Android) |
| Body | Metal case with perforated air inlet |
| Dimensions | Ø 340 × 720 mm |
Specifications may change due to continuous product improvement. Performance values measured under laboratory test conditions.
Regulatory Information:
This product conforms to IS 302 (Part 1) : 2024 — Safety of Household and Similar Electrical Appliances. BIS CM/L ______________. Do not dispose of this product with household waste; at end of life, return it to an authorised e-waste collection point in accordance with the E-Waste (Management) Rules, 2022. Marketed by Medcuore Medical Solutions Pvt. Ltd., Chennai — Brand: Nippo Airvue, in partnership with INL.
Air Intelligence — In Every Breath
Warranty:
A limited warranty of 1 + 1 years applies to the Nippo Airvue U1001S for defects in materials and workmanship under normal use, from the date of purchase as per the invoice. Warranty service by Medcuore Medical Solutions Pvt. Ltd. (Brand: Nippo Airvue, in partnership with INL).
| COVERAGE | DURATION / STATUS |
|---|---|
| Product — manufacturing defects (motor/blower, UV-C module, ioniser, sensors, PCB & firmware, display, internal wiring) | 1 + 1 Years |
| Filters (HEPA, carbon, pre-filter) & consumables | Not covered — chargeable |
| Physical / voltage damage | Not covered |
Warranty Claim Procedure:
- Raise a service ticket within the warranty period at www.nippoairvue.com/support or by email to support@nippoairvue.com, with your purchase invoice and product serial number.
- Our technical team assesses the complaint remotely within 3 business days; if needed, an authorised service engineer is dispatched to your site within 7 working days.
- On verification of a genuine manufacturing defect, the component or unit is repaired or replaced at the Company's discretion, at no charge. Replacement does not extend the original warranty period.
Warranty Exclusions:
- Physical damage — drops, impact, cracks, liquid ingress, chemical or heat damage, damage in transit after delivery, or any tampering / unauthorised repair.
- Electrical damage — voltage above 240 V or below 200 V, surges, lightning, or use of non-standard adapters or extension cords. A surge protector is strongly recommended; electrical damage from voltage irregularities is not covered.
- Normal wear and tear, cosmetic damage, and consumables — HEPA / carbon / pre-filters and UV-C lamps (replacement intervals as per this manual).
- Products with removed, defaced, or tampered serial numbers or warranty seals, products without a purchase invoice, invoices that do not match the product or have been altered, or damage from use outside the conditions specified in this manual.
- Damage caused by force majeure. Total liability shall not exceed the original invoice value. Full terms: www.nippoairvue.com.
Post-Warranty Care (AMC):
After warranty expiry, an on-demand Annual Maintenance Contract is available at 18% of the invoice value per year — covering repair labour, priority engineer dispatch, remote support, and 15% off spare parts. Subscribe within 30 days of warranty expiry. Free on-site installation & commissioning applies to orders of ₹ 50,000 and above.
WARRANTY CARD
Customer Name:____________________
Customer Address:____________________
Contact Number:____________________
Model / Serial Number:U1001S / ____________
Date of Purchase:____________________
Dealer Name:____________________
Dealer Address:____________________
Date of Invoice / Stamp:____________________